Set up font libraries and font stacks
Site Studio allows you to manage font libraries and font stacks used by your website. There are two steps to the process:
- Set up your font libraries
- Set up your font stacks
When setting up font libraries you have three options:
- Upload fonts. You can upload fonts to your website. When you upload a font it will be hosted with your website in the Site Studio directory. You must ensure that you have the appropriate licence to host and serve the font.
- Use web fonts. You can import fonts from web font providers like Google fonts. These fonts are hosted by the provider so all you need to do is add the URL of the font.
- Use system fonts. These are fonts that will usually be available on your users device so there's no need for you to provide the font. For example, Arial is a system font and the most widely supported. If using system fonts you can jump straight to Set up font your stacks as there are no fonts to upload or import.
Uploading or importing multiple web fonts will slow down your website loading speed. This is because your website will have to load each font. Only upload or import web fonts that you will use. Remove any fonts you are not using.
Upload fonts
To upload fonts:
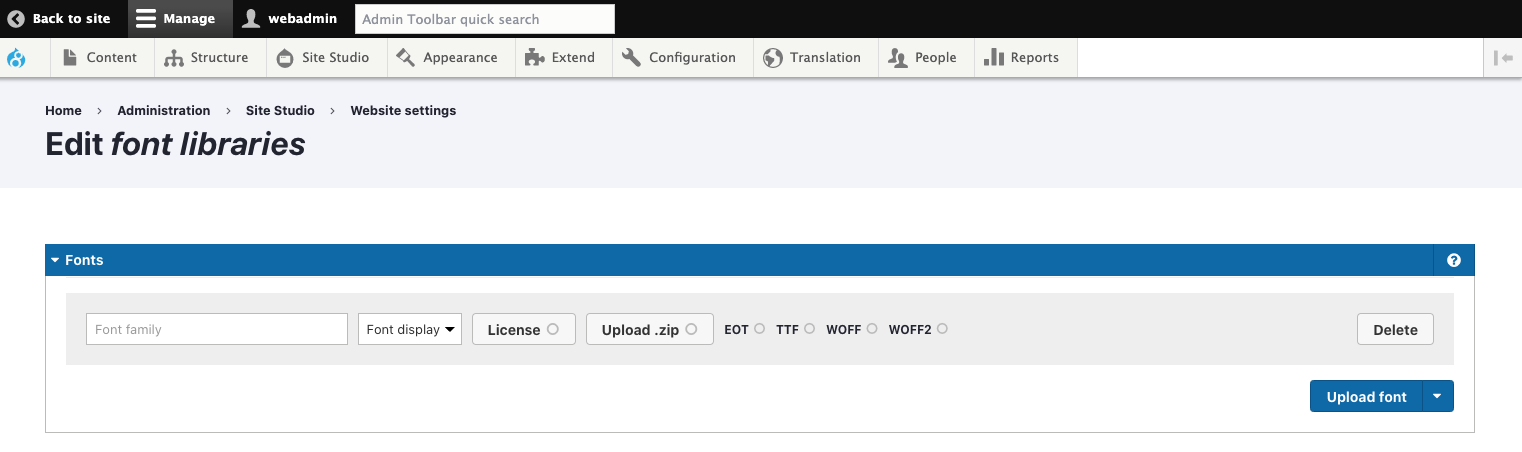
- Navigate to Site Studio > Website settings > Font libraries
- Enter the font family in the Font family field. Important - This will be the name you use when setting your font stack.
- Click on the Upload.zip button and select your .zip file containing your prepared fonts. The .zip should include your font in EOT, TTF, WOFF and WOFF2 formats. Successfully uploaded font files will be marked with a green tick
- Select the font display. For more information, see https://developer.mozilla.org/en-US/docs/Web/CSS/@font-face/font-display
- Click Save
To convert a font into EOT, TTF, WOFF and WOFF2 formats there are a number of online converters available.
https://transfonter.org
https://www.fontsquirrel.com/tools/webfont-generator
https://www.web-font-generator.com
Adding font license information
Many premium font providers (E.g. fonts.com, typography.com) require licence information to be included with your CSS and a tracking script for page views. If a tracking script is required, this would need to be implemented in a custom theme.
To add license information:
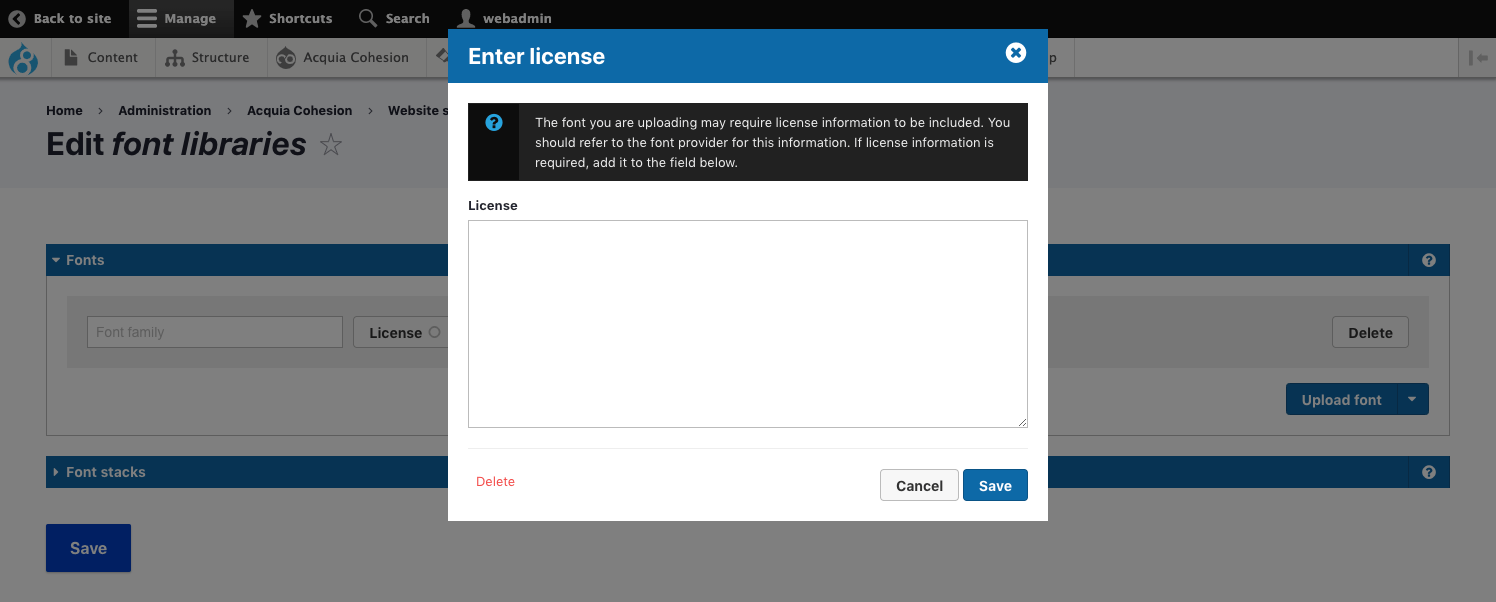
- Upload a font, following the steps above
- Click the License button
- Paste in the font License information into the pop-up modal
- Click Save
Import web fonts
To import a web font:
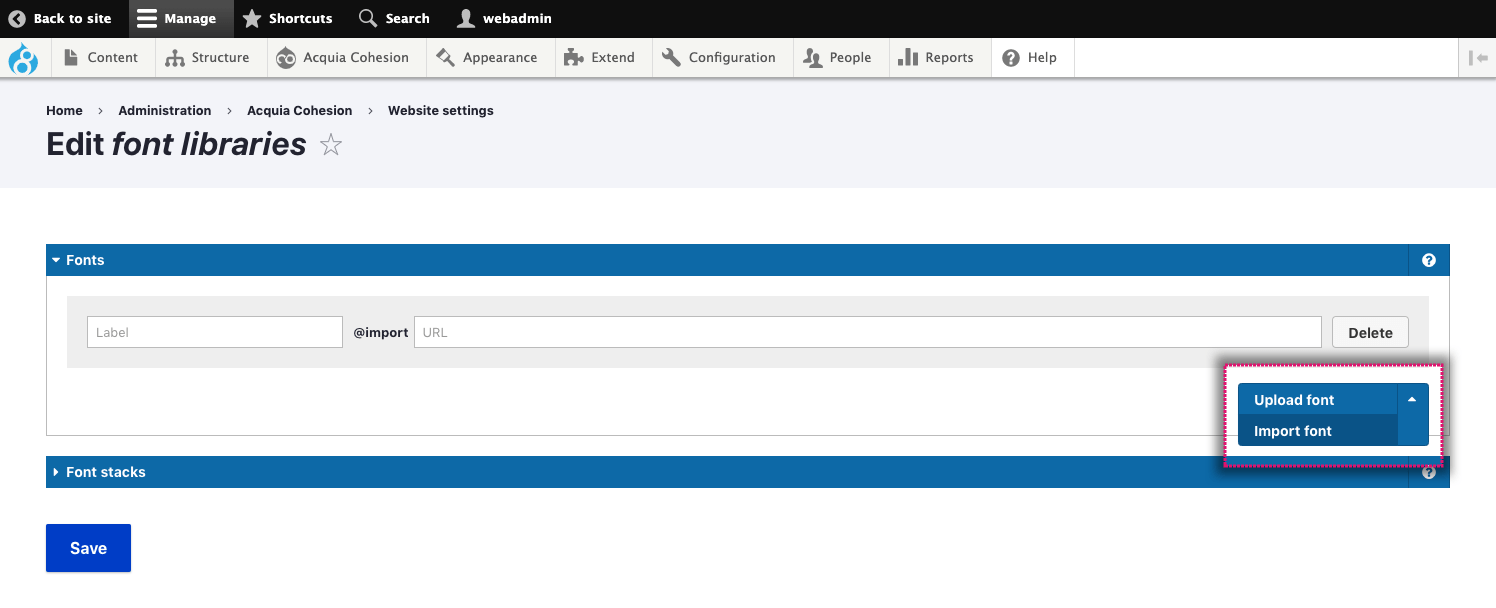
- Click on the Blue button arrow and select Import font
- Enter a name in the Label field. This is simply a label and has no functional purpose.
- Enter the URL of the web font in the @import field. As an example, the URL should be formatted like this: https://fonts.googleapis.com/css?family=Poppins:300,400,600
- Click Save
When uploading a font package into Site Studio, please ensure you only have one instance of each font format (EOT, TTF, WOFF, WOFF2) included.
If your font supports multiple weights, you will need to export each of these as separate packages. You will also need to create separate font stacks for each weight.
Set up your font stacks
Once you've uploaded or imported your fonts you need to set up your font stacks.
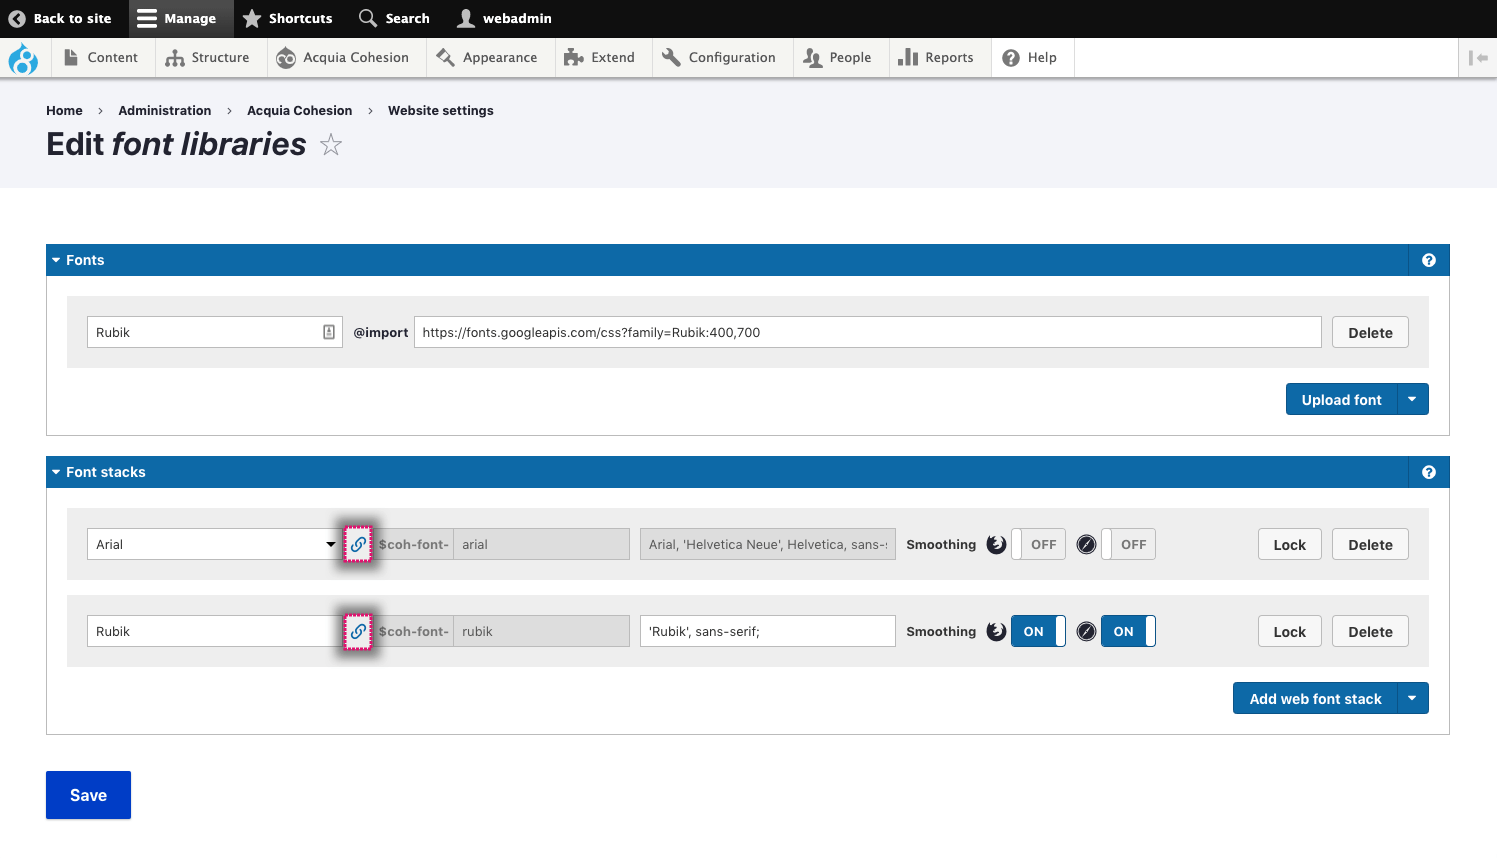
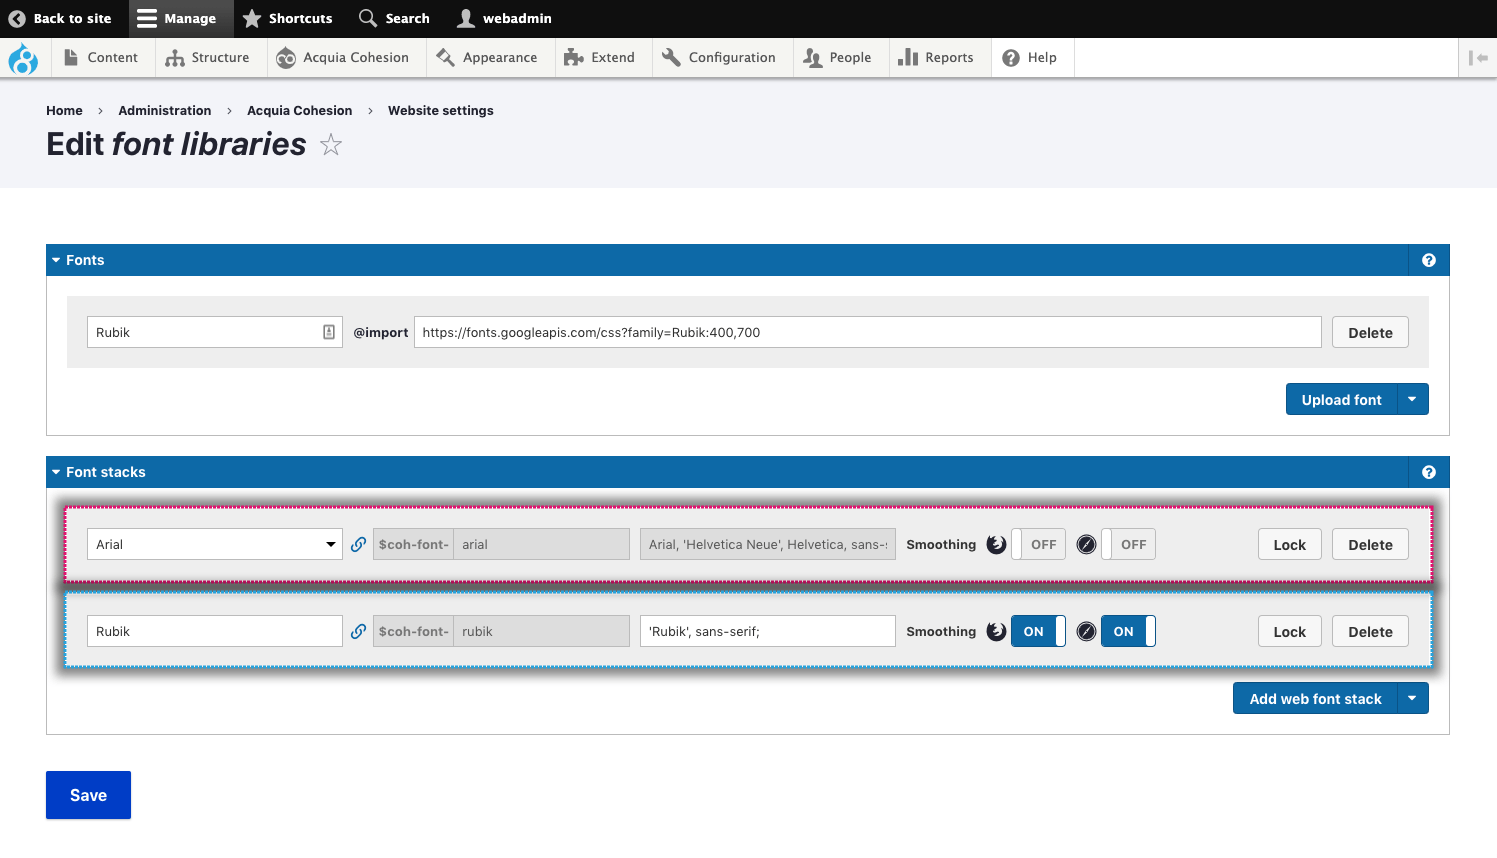
To set up your font stacks for imported or uploaded fonts (Highlighted with pink dashed line):
- Click on the blue button Add web font stack
- Enter a name in the Label field. This will be used to generate the font SCSS variable and to identify and select your font throughout the Site Studio interface. You can unlink the label from the SCSS variable if required.
- Enter your font stack in the Font stack field. Your Font stack should be formatted like this: 'Poppins', sans-serif;
- If you want to apply font smoothing, Toggle on the Firefox and Webkit toggles
- Click Save
If you have uploaded a font, your font stack will need to use the name entered into the Font family field. If you have imported a web font, your font stack will need to use the font family specified by the font provider.
To set up a system font stack (Highlighted with blue dashed line):
- Click on the arrow on the blue button
- Click on Add system font stack
- A new system font stack row will be added to your form. Site Studio provides drop down which includes different system font stacks
- In the drop-down click on the system font stack you want to add
- Click Save
When using Site Studio sync to export font stacks or Site Studio entities that have a dependency of a font stack such as a base style; the font library is not included as a dependency of font stacks and is therefore not included in the export file. If the font library is required, you should export it separately using Site Studio sync.
Link/unlink font stack label
When adding a new font stack the label and variable fields are linked by default. You can link or unlink the font stack label from the SCSS variable to allow the label to be different from the variable.
Note you can only change the font stack variable of a font stack that is not in-use.
To unlink a font stack label and variable:
- Navigate to Site Studio > Website settings > Font libraries
- Click the link icon next to the label field. The variable field will turn white
- Update the font stack label
- Click Save.